SL100 Racer project No battery required!
Step one : Getting rid of battery and other junk
Because racers should be as light and simple as possible I decided that the battery and charging hardware had to go so I set out to accomplish this task before getting into alloy rims etc.
Things you will need: Honda rotor puller (a must have). TIP the rear axle can be used as a rotor puller! An AC 6v type coil ( where the plug wire comes from) If you need lights for enduro you will need a "Moose" 12V regulator ( about $15 from Parts Unlimited thru your local dealership) and 12V lights.A 14mm drain plug washer, aluminum like the ones used on Honda oil drain plugs.
Start with a well tuned SL especially the points and timing must be set to specs, if not this will not work!
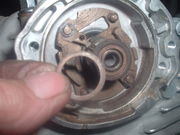
Mark where your point plate is after making sure it is timed correctly so you can put it back in the right place.Remove points plate without loosening points and remove the springs on the advance unit. remove the bolt holding the point cam on and fully advance the mechanism, place the 14mm drain washer between the bolt and the point cam and replace the bolt. The washer will hold the advance at full position without doing any welding etc. Reinstall the point plate and line up with your mark.
Next remove the rotor with proper puller, remove the woodruff key and set it aside, you will not need it.Turn the engine over to the point that the points just start to open. Clean the taper on crankshaft and inside taper of rotor with contact cleaner to remove all oil and grease.
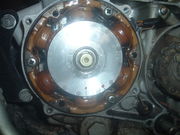
Install the rotor so that the magnets align directly with the coils on the stator. Replace the bolt and torque it down normally. The rotor should not slip as the taper is what holds it in place and not the key. Turn the engine to wher the points just start to open ( fire). Now scribe your new fire mark on the rotor for future tuning,( magnets should be aligned with coils ) also do the new TDC mark ( top dead center). Just remove the spark plug and insert straw etc. till piston is at top.
There are 4 wires coming from stator, one yellow, one pink, and one white. The other is for neutral light and is not needed. Run yellow to your newly installed AC coil, ground the pink ,and the white can be used for lighting, 6 or 12v. 12 v stuff is easier to get so I used 12 volt bulbs with the Moose regulator.
Hook up a kill button and enjoy the simplicity, no rectifier, no fuse, no switch with key and best of all NO BATTERY!
NOTE, If you want lights for sure Moose sells a kit that comes with the regulator, a multi purpose handle bar switch that has kill button, on/off and high low beam with wiring that may be helpful. It is about $75 $80.


